Piloting Moths 101 - Titan Physics
The aerodynamics of Titan are rather different to those on Earth. It is impossible to roll a moth, stalls occur for completely different reasons, gravity and inertia arent quite what they used to be. All, in all, its enough to have Isaac Newton developing high angular momentum in his grave. Either that, or all those Comp Comp the moth factories buy is for a very sophisticated fly-by-wire system.
Thats as technical as Im going to get - dont worry, theres no equations coming up and a moth is very easy to fly. In general - and this applies to all moths - these are the points that a skilled and cunning pilot needs to take into account:
Weapon Choice
My usual weapon combination is plasma cannon & laser. A turret is certainly very handy on moths that will take one. Im not a big fan of missiles because theyre very expensive for most purposes - even if you manufacture them yourself.
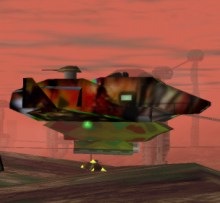
A Hawk Moth in Downtown.
General Flying
Sometimes youll prowl about looking for victims. Sometimes youll get locked into a desperate furball, but a lot of the time youll take off shifting goods from one place to another. For this a fast moth - at least a NeoTiger and preferably a Swallow is invaluable. Always make sure you know which way to turn at the start - even if only approximately. Maneuver as little as possible - keep that speed up. This presents an interesting dilemma - what altitude to use? The higher the altitude you travel at, the more visible you are and the more time wasted in climbing. This is particularly the case if you have a cloaking device which requires you to keep low in order to be effective. On the other hand, traveling at a higher altitude usually means youre slowed down less by dodging around buildings and the topography. Timskis maps have all the details of the orientation and altitude of Mis-Ops hangars and are invaluable for planning hops. Get them here. Dont underestimate speed - a skilled and cunning pilot can outrun most problems in a fast moth - if he knows where hes going.
Id probably use missiles more - for specific purposes - if they could be removed once theyd been fitted. Its very easy to end up with a huge collection of weaponry on your moth and to spend a lot of time getting shot-up while cycling through all the options. I like to keep things simple and use plasma kannon, laser, afterburner and holograms in that order. All the information you need about the many and exotic missiles (and other weapons) is on Zedos site.
Check 6 - Situational Awareness
While in flight, remember to check your radar regularly - its very easy to bore-sight on where youre going. I also tend to keep clicking next target - if you dont, you wont know what threats and opportunities youre passing by. Know where youre going without having to have your destination locked into the nav computer and then youll be able to check up on what happens along the way.
The combination of speed and situational awareness is vital. It can avoid a lot of scrapes, and also provides a number of unexpected opportunities. If someone is going to bounce you even a couple of extra seconds warning can make all the difference.
Titan BFM
The Golden Rules of Hardwar combat are:
BFM - Basic Fighter Maneuvers
If youve come to Hardwar from proper flight-sims - you should prepare to forget almost everything you know about BFM.
Some of the rules still apply, especially lose sight, lose the fight, but theres no need to worry about stalling in a turning fight, keeping your energy high or any out of plane maneuvers - you will never need, or indeed be able to do an Immelmann turn or high yo-yo.
There is a maneuver specific to Hardwar though and thats the fast turn.
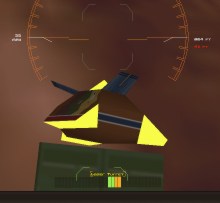
This Hawk cant use its laser turret against an attack from this angle.
Fast Turns
At full throttle, turn hard, rolling over as far as you can go and pulling back on the stick. When the stick is fully back, slam the throttle into maximum reverse. You can turn on a dime like this, and it rapidly becomes second-nature.
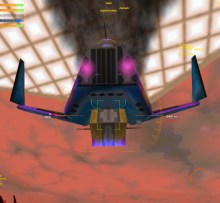
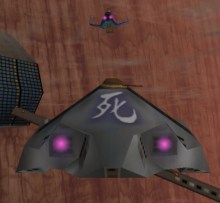
This Deaths Head is in an ideal position to control a fight against the Hawk in front of it.
So, how do we put this into practice?
There are essentially two dogfight situations that can arise - offensive and defensive. The former gives you an enormous edge compared to the later because it enables you to start the battle in control.
Tally Ho! - Offensive Dogfighting
On the attack youve got the initiative. Get into a control position, behind and below and open with your plasma kannon. Try and maintain this relative position for as long as possible and pepper your opponent with fire. When his shields are degraded switch to your secondary weapon: laser or turret and try and finish the battle as soon as possible. I tend to prefer using the laser to the turret gun as it does damage more rapidly if you can keep it on target. Ill only switch to the turret if I lose the control position because its important to keep pounding the enemy. There are a couple of situations where the turret is particularly advantageous though. In crowded areas or in tunnels the laser turret reduces the chance of a friendly fire attack. This is particularly important if the police are around - because you really dont want them on your case.
Try and keep a watch out to see if anyone else is joining the fray on your opponents side. This sometimes happens and can be very annoying. This will often happen if youre attacking faction moths in a crater dominated by that faction. Its usually best to finish off your current enemy first and if you can do this quickly then the other attacker need not present too many problems. If you get into a one-vs-many situation though, it might be time to hit the burner and bug out.
Bandits 8 O'clock High - Defensive Dogfighting
Even with the best management, youre going to get bounced sometimes. When that happens, you have to decide what to do, and decide quickly.
If youre actually under fire, maneuver now, and while doing this target your attacker. If there are multiple attackers, try and target the nearest. Multiple attackers are a real headache - for more information see one-vs-many.
Whatever the situation youve got to decide whether to fight or escape. This is a complicated decision which depends on the relative speeds of you and your opponents moth, how close they are when they target you and your location. If youve got the speed, distance and a handy tunnel entrance nearby then running can be an attractive proposition.
In other circumstances youve got no choice but to stand and fight. Well fight, anyway. The last thing you want to do is stand still. If youve got the time before the bandit is in range use that to improve your tactical situation. Get low, turn around, and jink to the side (for a flank attack) just as hes upon you. Its possible to switch the advantage and turn defense into offense. If possible use buildings and the geography of Mis-Op to your advantage - dips are great for getting a crucial advantage in getting below your attacker and buildings can be used to stage ambushes and to increase the effectiveness of ramming attacks.
Downtown Dodgems - Ramming Attacks
Ramming attacks are often highly effective. They cause damage and can immobilize moths giving you a few free seconds. If you ram someone into a corner they can be immobilized even longer because the AI pilot gets very confused. This can be particularly useful in tunnels because if you kill a moth in the tunnel you can scoop the remains at your leisure. Ramming doesnt count as an attack so you can ram faction moths and enforcers to death with impunity. This is a risky tactic because you also damage your own moth and it seems to be more a matter of luck than anything else who dies first. If you can arrange it - and it can be quite tricky - repeatedly ramming the other moth into something (so they take two collisions to your one) dramatically increases the chance of coming out of ramming someone to death relatively unscathed. The type of moth you have seems to have no bearing on the damage inflicted or received from a ramming attack.
Free Hit
You are allowed one free hit with a missile or cannon before your actions count as an attack. This means you can use a devastator to kill someone - like an enforcer, for example - with impunity. As your attack doesnt count you dont get any bounty associated with the kill either. Whenever you get the chance try and make your first free hit really count.
Vampire Inbound - Defense Against Missiles
I rarely use missiles because they are almost always not cost effective. I hate them being used against me. AI pilots dont share my frugal ways and will usually think nothing of unleashing missile after missile. My absolute least favourite to have fired at me is the groundbase - very annoying and difficult to avoid. If someone starts groundbasing me I tend to hit the burner and get out of the way. Having said that Im just a coward, and there are things you can do when you come under missile attack.
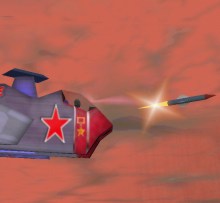
An L2000 launches a sprat. Sprats are about the least of your worries when it comes to being targeted with missiles.
Every Pilots Nightmare - One vs Many
A one vs many furball is about the most dangerous situation you can get into. Many pilots will simply run as soon as they see several moths chasing them. If you do decide to stay and fight there are a few things you can do to even up the odds a little. Your basic strategy should be to do as much as you can to minimize the number of moths that can actively attack you at any one time, while you pick them off individually.
Once youve targeted one moth fight that one and keep fighting it. Its imperative to get the numbers that are attacking you down rather than partially damage everyone else in the battle. While youre fighting this moth (all other things being equal, usually the nearest one) use every trick in the book to prevent the others being in a position to hit you. Using geography and buildings is particularly helpful here, as is having a quick moth.
Try and keep the other moths, as much as possible, in one part of the scanner, if it looks like youre getting surrounded then get out fast.
Im a Dot - Escape and Evasion
Discretion is often the better part of valour - and on Titan theres no percentage in valour. If you need to run, then do it as soon as you feel youre really losing the fight. The afterburner is the tool of choice for getting out of situations. Holograms (which give you a seven second breathing space) are also useful, though very expensive. In an absolute emergency, you may need to use both. With good situational awareness, tactics and knowledge of the craters it should rarely come to that.
Unless its the direst emergency, dont afterburn until you know where youre going. Its always handy to know a number of boltholes (either your own hangars or neutral ones) which you can duck into to consider your options and recharge your shields. Dont run to a hangar within the same crater (AI moths always negotiate tunnels slowly) unless you know you can get there and dock before the pursuit has caught up with you - theyll pound you relentlessly as you try and dock. Controlling an afterburning moth is very tricky, though docking is possible with very fine throttle control. If you make for another crater, its wise to know beforehand which tunnels are burnable through. Straight tunnels are much easier.
Managing your afterburner is important. It can be tempting to use it to relieve the monotony of trading runs, but its worthwhile keeping it in reserve, so youve got it when you really need it - this is especially the case if youre flying a slow moth like a Deaths Head. On the other hand, if youre carrying particularly valuable cargo which you know will attract unwelcome attention its frequently, where practical, a good tactic to plan an afterburning route. Just make sure you can navigate any tunnels you may have to enter with the burner on - crashing into the monorail at 1300 mph is deeply embarrassing to your next of kin.
If you havent got a burner, making for a tunnel is even more important. Try and keep low, fast and jink, using all available cover to shield you. Once through, duck into the first hangar you can get into and breathe a sigh of relief.
Below is a schematic map of Mis-Op to help you plan your escapes and evasions.
Afterburning
The burner operates for 5s and takes 30s to recharge. It boosts speed and acceleration both forwards and backwards by a huge amount. To get the most out of a burn, have your throttle slammed to max before you engage. Its possible to burn backwards, though this isnt recommended.
|
|
|||||||||||||||||||||||||||||||||||||||||||||||||||||
|
|
|||||||||||||||||||||||||||||||||||||||||||||||||||||


The Art of Droning
Scooping cargo and scrap can be singularly dangerous because youre frequently practically stationary. There are two tricks that can reduce the amount of time you spend at risk:
Hardwar Versions
This guide is written based on Captain Kronos experiences in offline HW U3B4, Though the majority of the Captains facts should hold for most of the commonly played versions of the game.
There are differences between the versions though, so dont take anything as gospel, certainly not on Titan, and certainly not from Captain Kronos.
As ever, if you want a second opinion, consult the links and in particular Zedos site and timskis Hardwar FAQ.
A fast drone retrieval about to take place.
Summary - Habits of Successful Flyers
Successful flying in Hardwar isnt so much about skill as knowledge and tactics. If you know your routes (especially a few good escape routes), and you avoid battles you arent pretty sure youll win, youll soon make enough to devote yourself to the more lucrative field of commerce.
